
All About Microblading

My Experience
Lately, I’ve been hearing all about microblading, the latest trend in semi-permanent makeup. Ever since a friend had it done earlier this year I’ve been interested in getting it, but was always apprehensive about it. So when Tracy from Arched Artistry reached out to me through Instagram about getting it done, I was in!
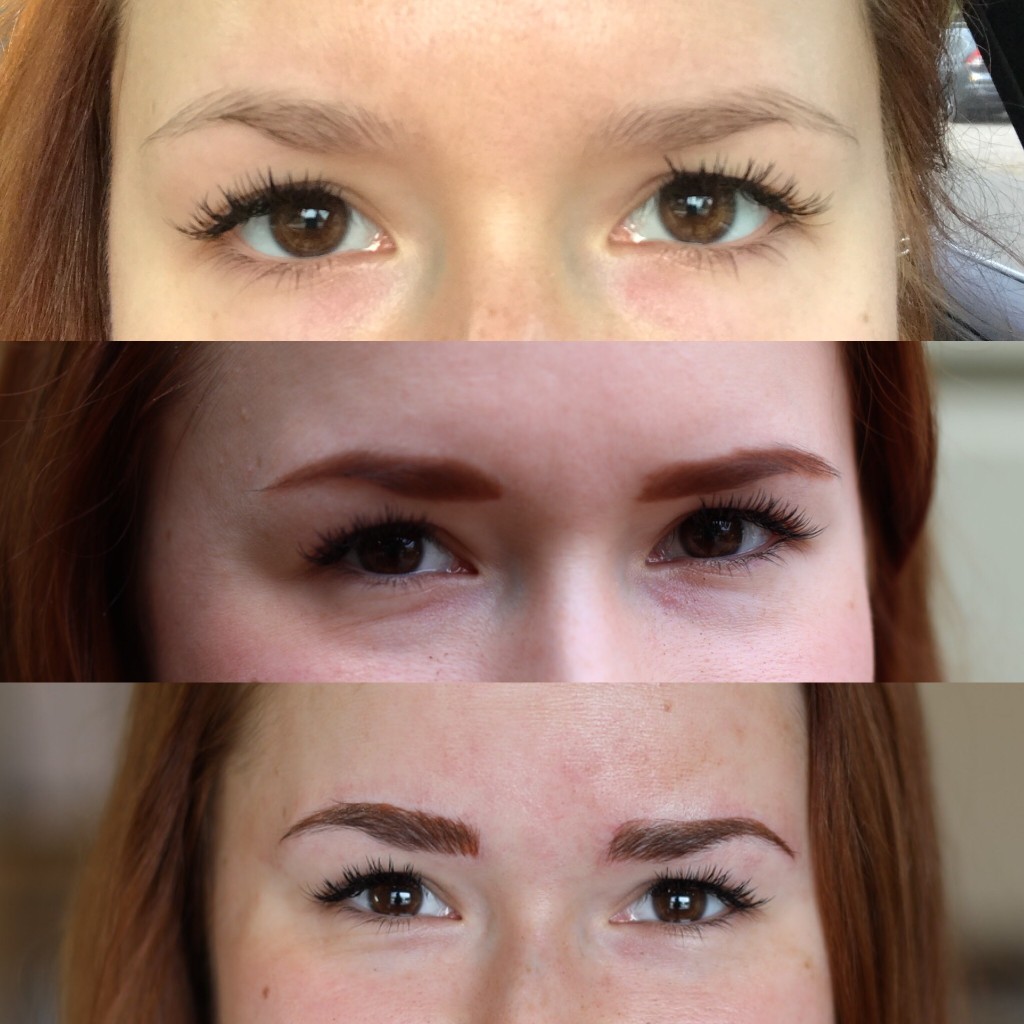
I’m thrilled with the end results and if you’ve been following along with my Instagram stories, you’ve probably seen my brows change throughout the healing process. Now that they’re all healed up, I’m stoked to share the before/after photos and answer all the questions that I had before the procedure and that you guys sent me!
So let’s dive-in.
What is microblading?
Microblading is a form of semi-permanent makeup that mimics hair strokes to create the illusion of thick, full eyebrows. A micro-sized blade is used to make small cuts in the skin to deposit color in the area. Microblading is great for those with light colored or patchy brows or for those who just don’t want to worry about filling in their brows everyday! The results are a natural look and last from 1-3 years with only a few touch-up appointments here and there.
Before I had microblading done, I filled in my brows everyday as my natural brows are sparse and light colored. When I would workout, especially something very sweaty, my brows would rub off. Plus, I’m super low maintenance when it comes to beauty, so I figured microblading could be a way to save another few minutes each morning and just “wake up like dis”.
Selecting your microblading artist
I think it’s important to note here that you should do your research when it comes to selecting someone to do your microblading. Microblading is truly an art form and it’s semi-permanent so you don’t want to go around with brows you hate for the next year or so. If you’re in the Greater Seattle or Bellingham area, I highly recommend Tracy from Arched Artistry. She not only uses top of the line tools, but she has training and experience under her belt.
As with any medical procedure, semi-permanent, or permanent alteration to your self, I recommend interviewing your service provider to ensure that they are a great fit for you. Here’s a few questions I would suggest asking your microblading artist before the procedure:
- What is your approach to microblading and ensuring that microbladed brows maintain a natural shape?
- What is your background, experience level, and training?
- What types of tools do you use?
- What hygienic standards do you maintain?
- What is the aftercare process and instructions to follow?
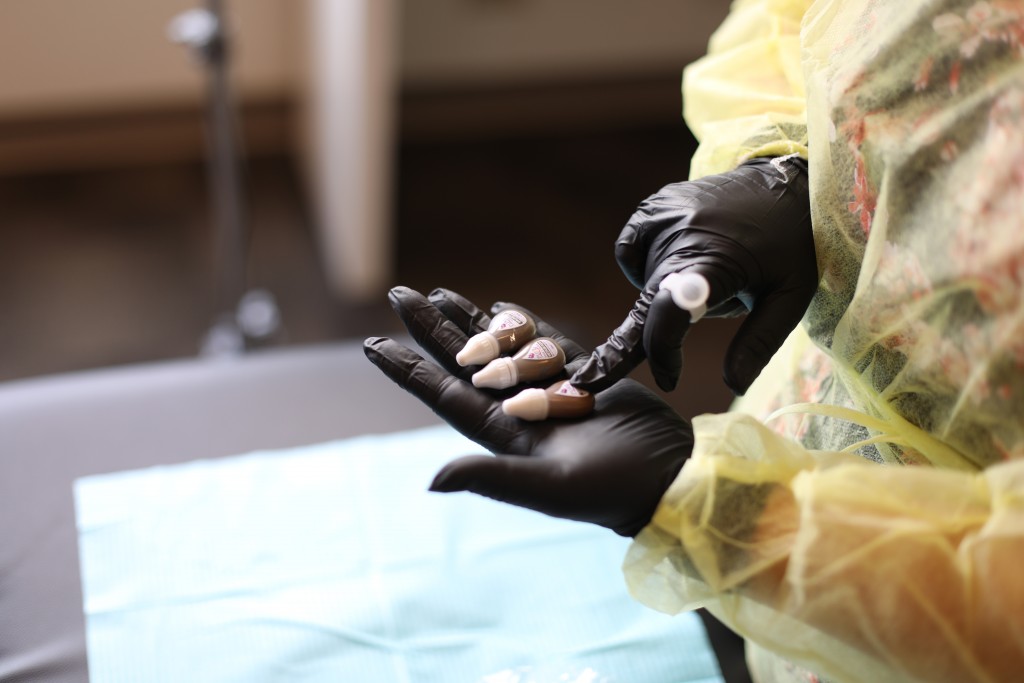
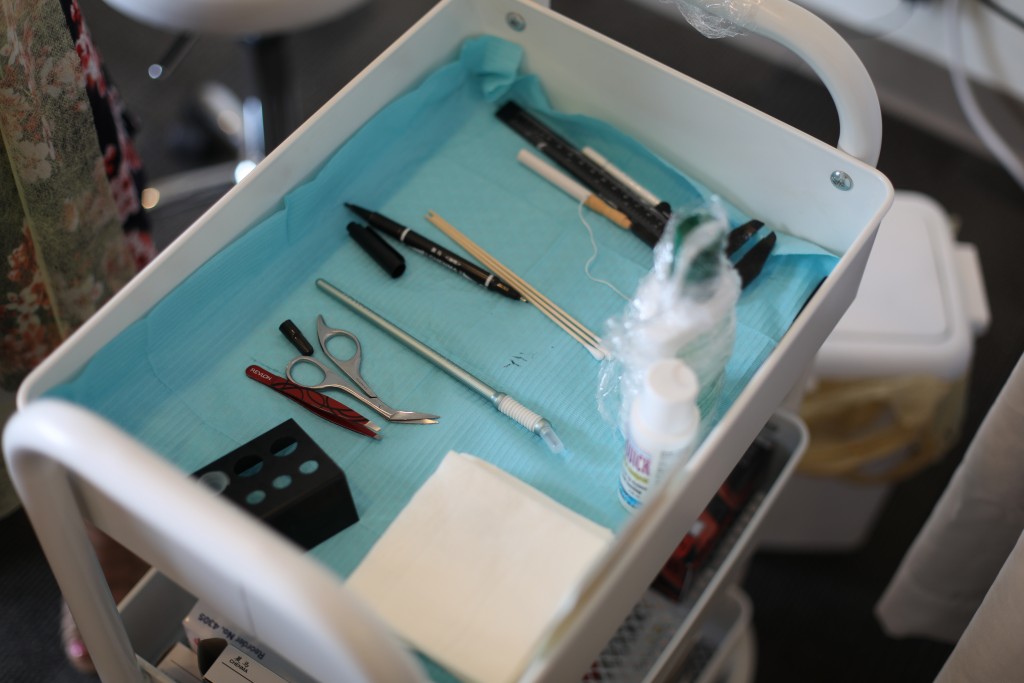
What I love about Tracy from Arched Artistry is that she considers microblading an art form, taking the utmost care to create lifelike brow strokes so that your microblading blends in seamlessly. By taking this approach, she is able to create an authentic and real looking brow. In addition to that, Tracy utilizes only the highest quality microblading equipment, sterile and disposable blades from Tina Davies.
How to prepare
On the day of your appointment, make sure to not drink caffeine or take blood thinners such as ibuprofen or aspirin. If you normally pencil in your brows, come to your appointment with your brows filled in so that your brow artist can see your normal style! Also, make sure to breathe and relax!
The procedure + what to expect
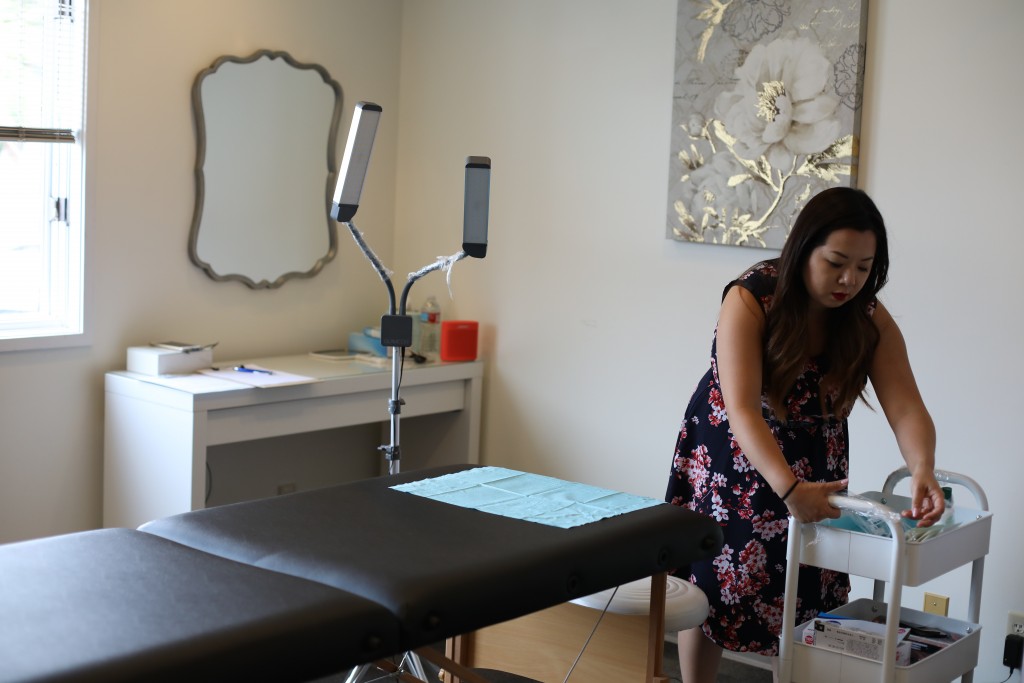
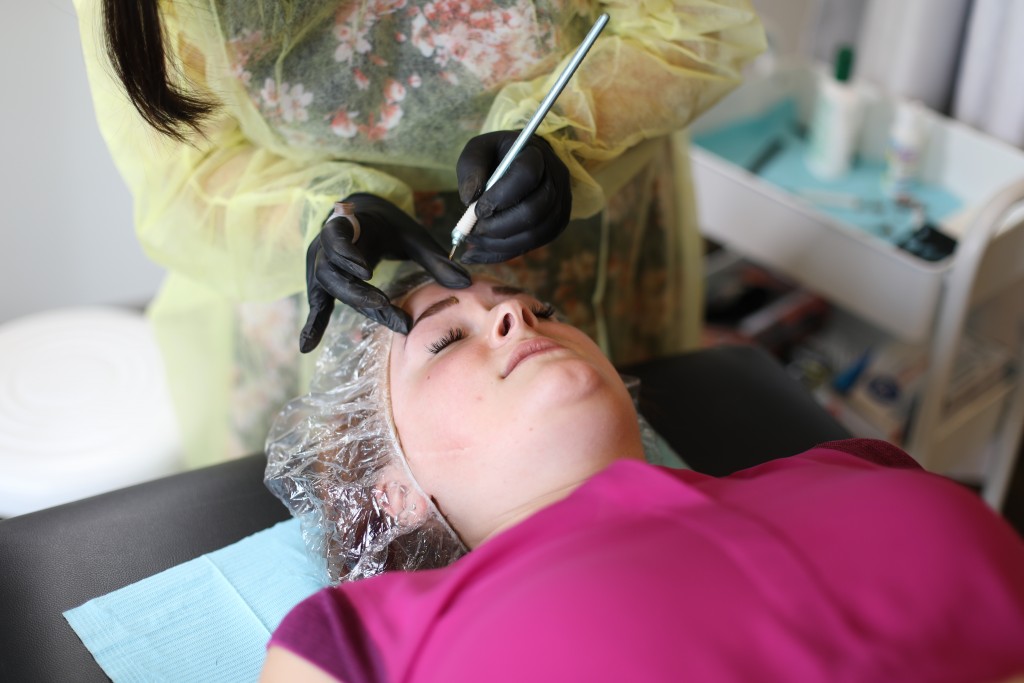
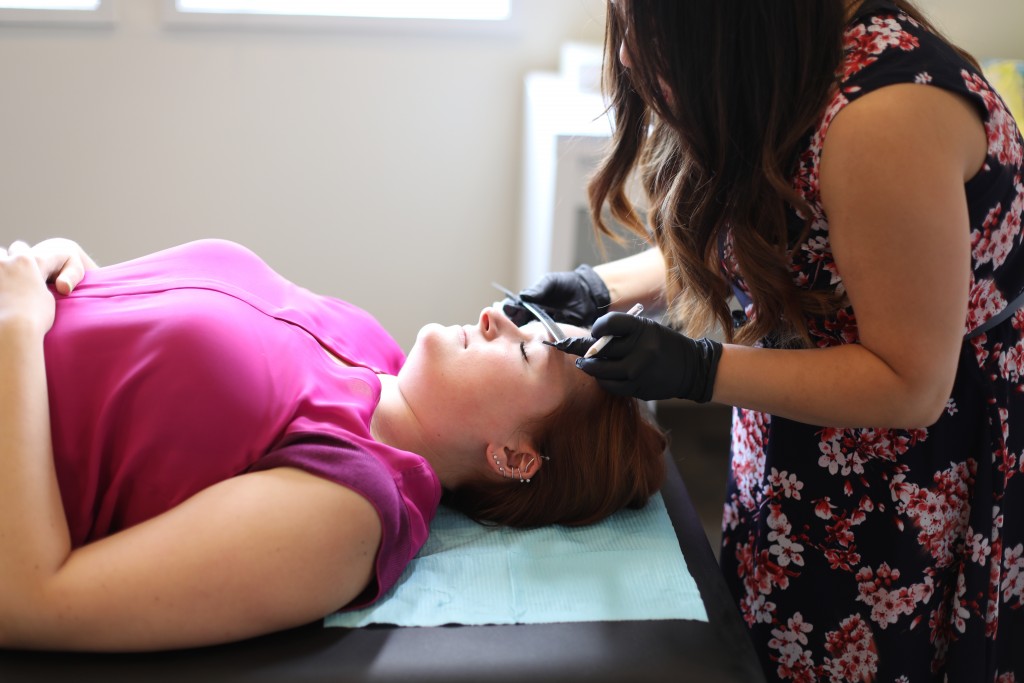
I wasn’t nervous about my first appointment until I walked in and realized this was really happening! Tracy had done a wonderful job of prepping me in advance but I still had some questions about the color selection and general nervousness about the unknown. Honestly, I had no reason to worry, though, because I was in Tracy’s skilled hands!
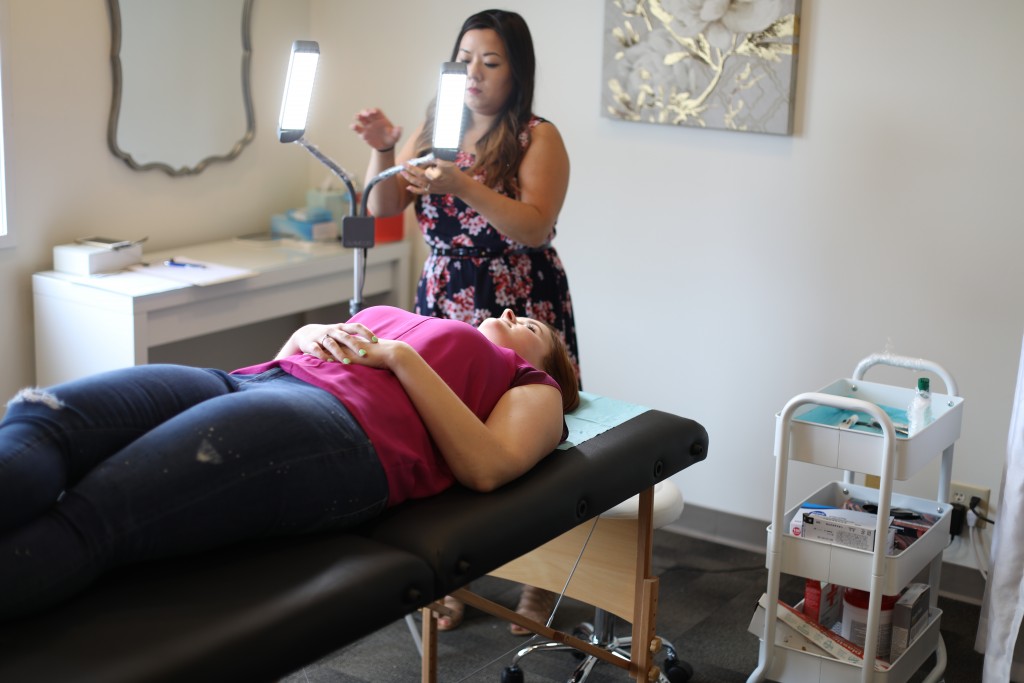
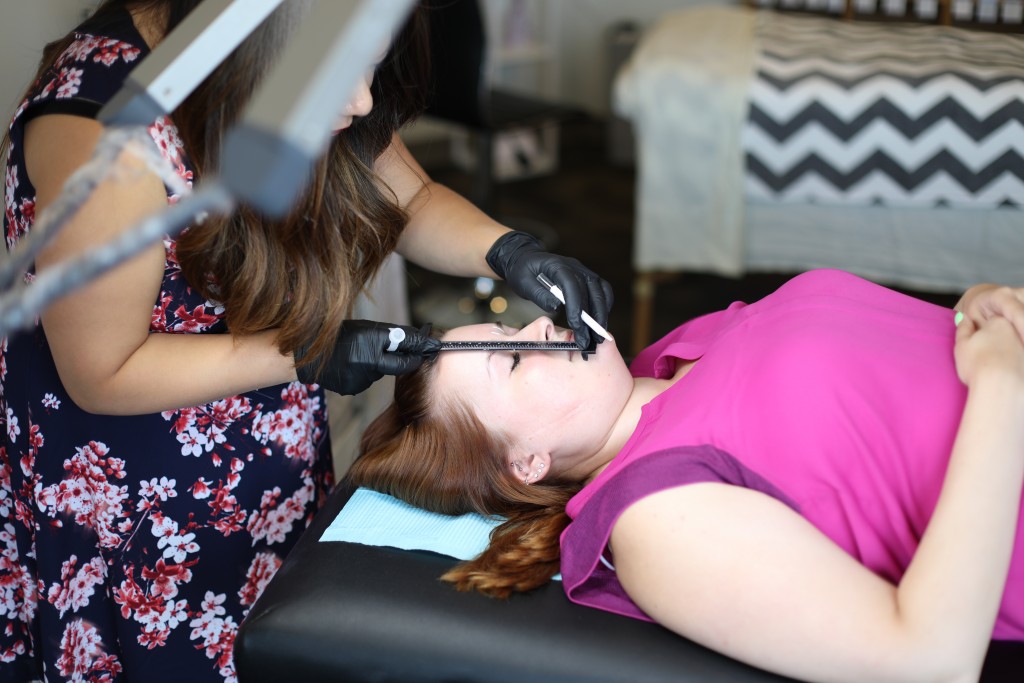
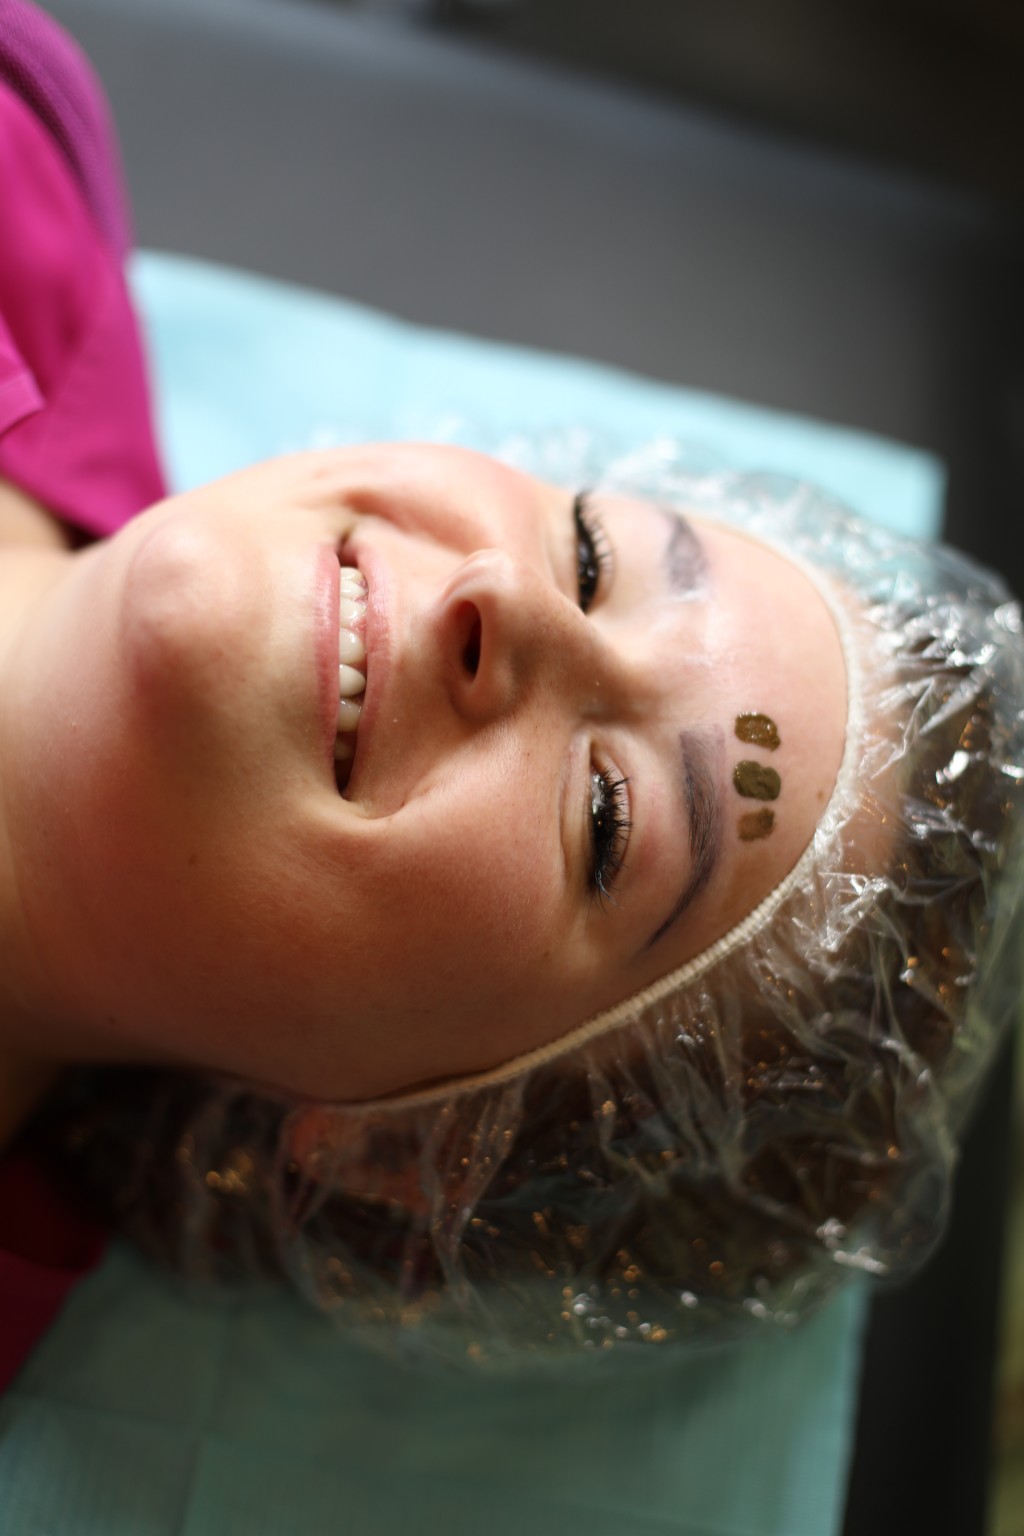
Your first appointment will take a couple hours to complete and upon arrival your microblading artist will walk you through the procedure and explain the next steps. Tracy chatted with me about what I hoped to achieve with my microblading (fullness and a more defined shape) and then dove into the process! After removing my penciled in brows, Tracy cleansed the area and then began to measure each brow including the length, distance between, width, and arch. She started making marks with a surgical marker, essentially drawing in the shape to make sure that both brows would have the same shape. When she was done with this phase, she let me look in the mirror and provide any feedback I have on the shape. To be honest, I think this was actually the scariest part of the entire experience! When I saw my brows all marked up I really hoped it wouldn’t be there when the appointment was over. (Tracy assured me that it wouldn’t be!)
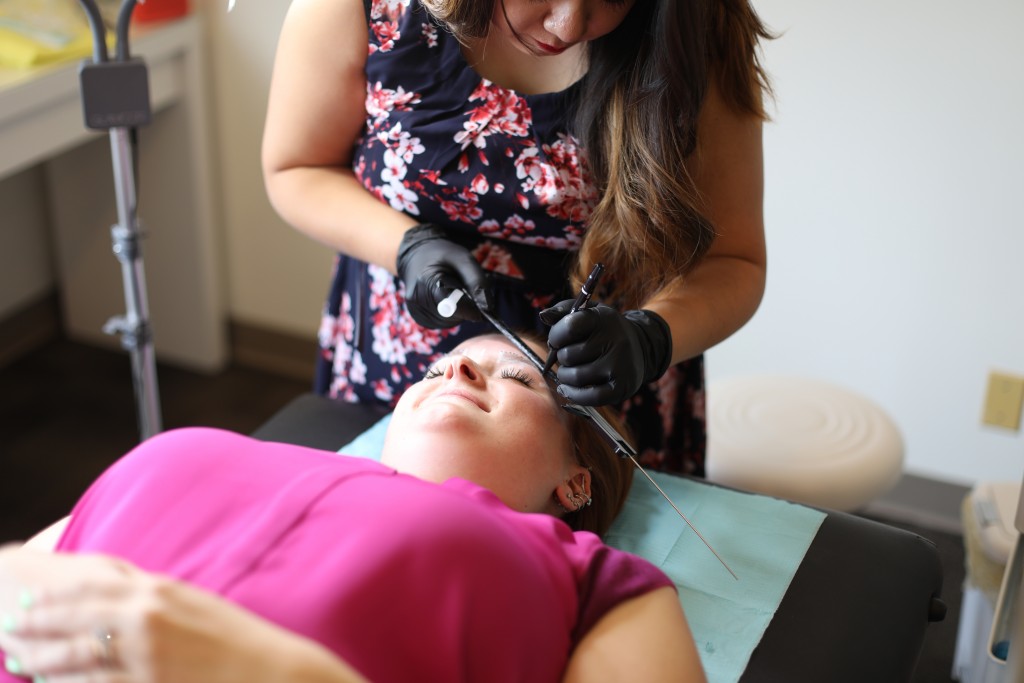
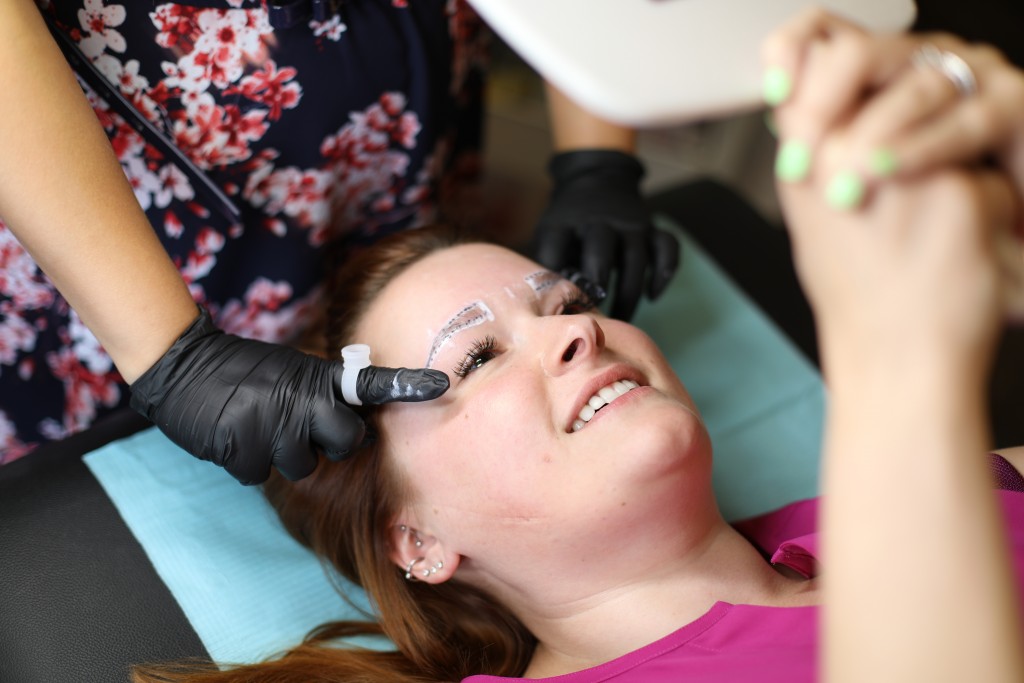
Following this, Tracy put a numbing agent on my brow area. While we waited for it to numb, we worked on picking out a color for my brows. This is probably what I had been most nervous about: how could I be certain I’d be the right color? Tracy selected three options from her colors and put a swatch of each on my forehead above my brow area. I immediately knew that “my” color was there and selected the auburn option – I was so relieved!
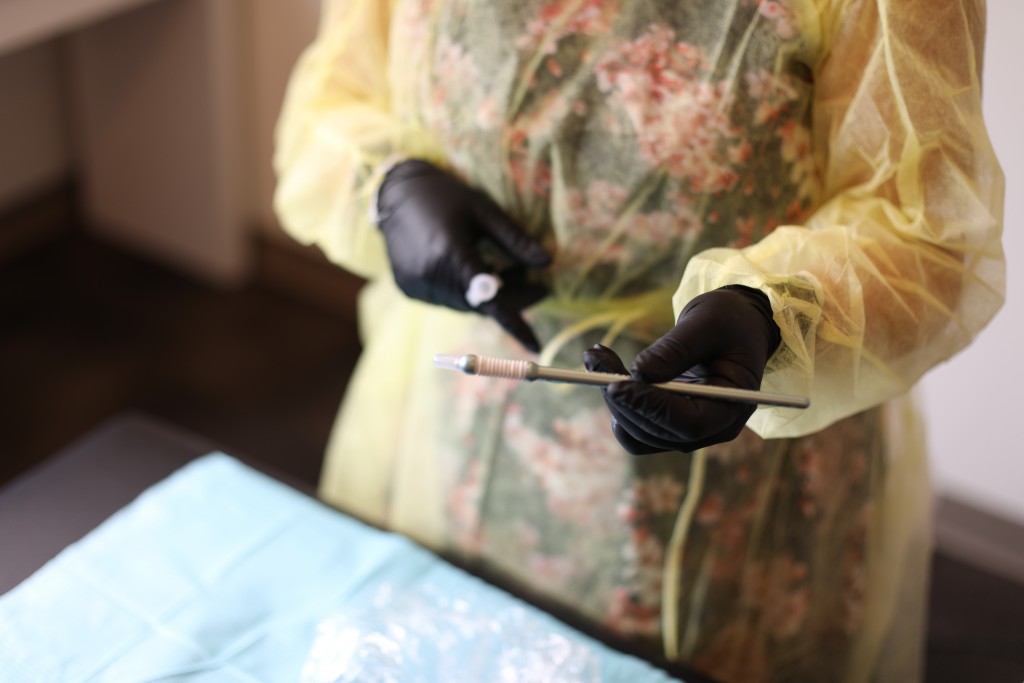
After 20-25 minutes, when I was good and numbed, we got started! Tracy would wipe off one brow, then use the microblade to make small, hairlike incisions. After doing one side, she would apply more numbing agent and then move on to the other brow. This process would repeat multiple times throughout the session. When Tracy was nearly done, she let me take a peak and provide feedback to point out anything I may notice. A few more back and forth between the brows and we were done!!
After the procedure + the healing process
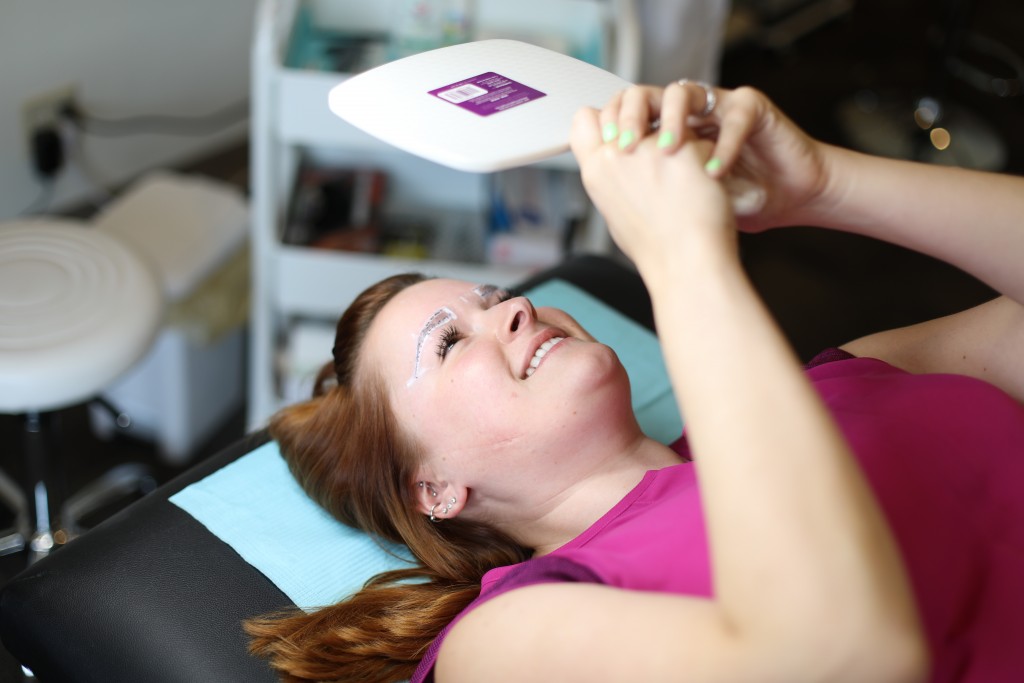
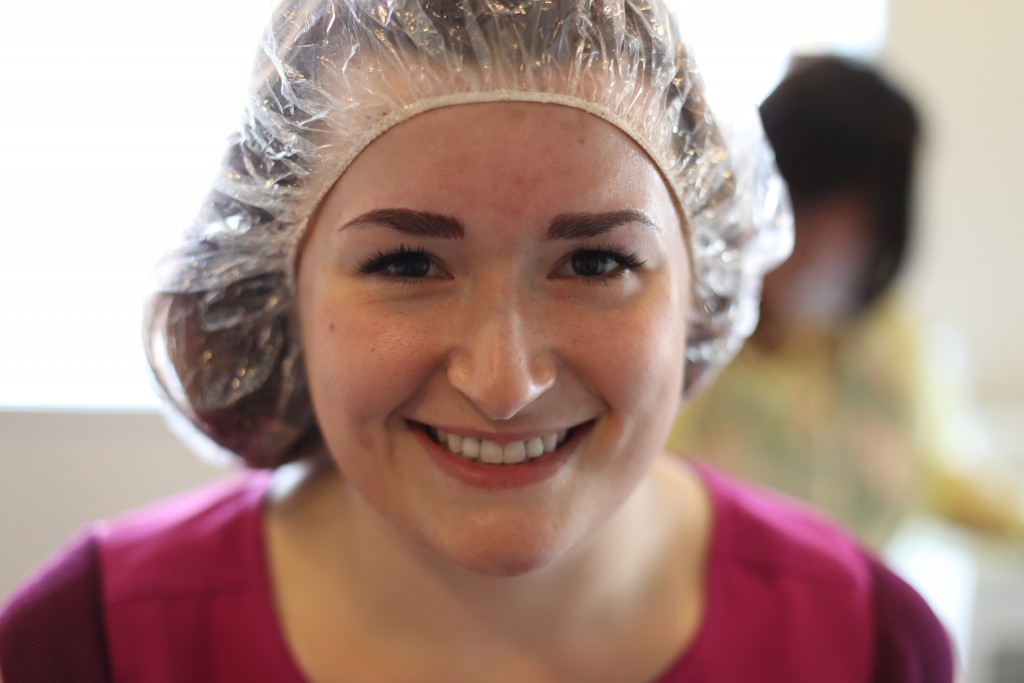
My brows looked fabulous! I was thrilled with the initial post-procedure look. I did have some redness around the brow area, which is to be expected. As the numbing agent wore off there was a dull throbbing in my brow area, but nothing horrible. It was all totally worth it!
I could not stop staring at my brows for the rest of the day (luckily Jon was driving).
The following six weeks after microblading is your healing period. In my opinion, the first three weeks are the most crucial part of the healing process. Each of these weeks serves a different purpose, and it’s important to follow the aftercare instructions that you microblading artist provides. Tracy gave me a lovely little printout, plus a packet of A&D ointment to apply to my brows. Here’s what the healing process looks like for the first three weeks:
- Keep brows moistened with A&D ointment for a minimum of 7 days, applying 3-4 times per day
- Do not use Retin A of glycolic acids, peroxide, or Neosporin
- Do not get your brows wet for at least 7 days
- Avoid sweating and tanning for at least 7 days
- Do not pick at any dry, flaky areas during the healing process
- Avoid cosmetics on your brows
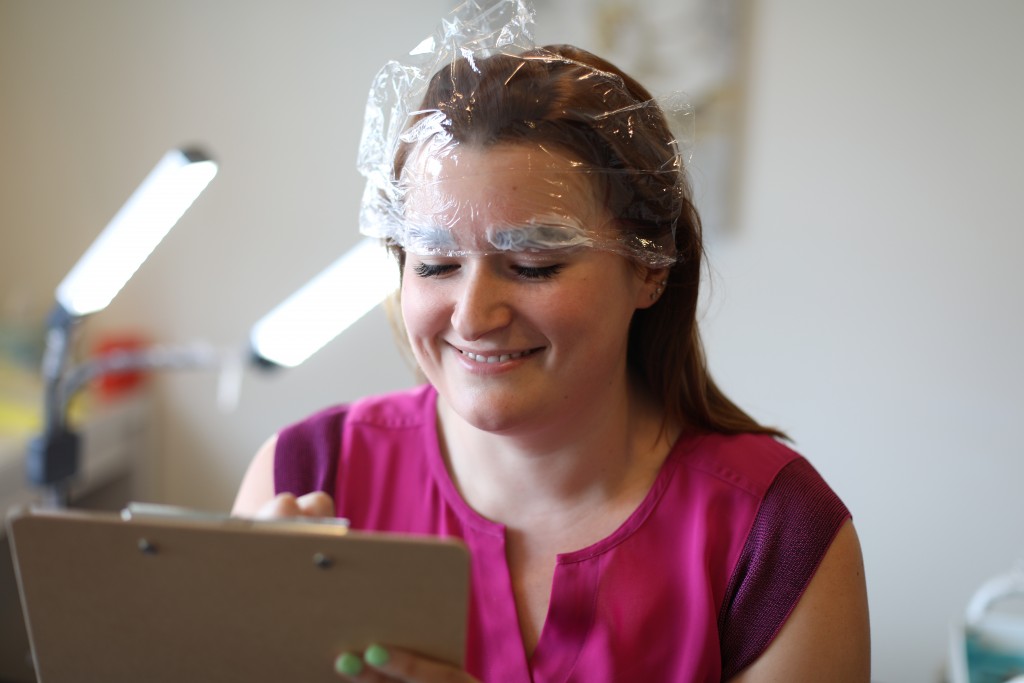
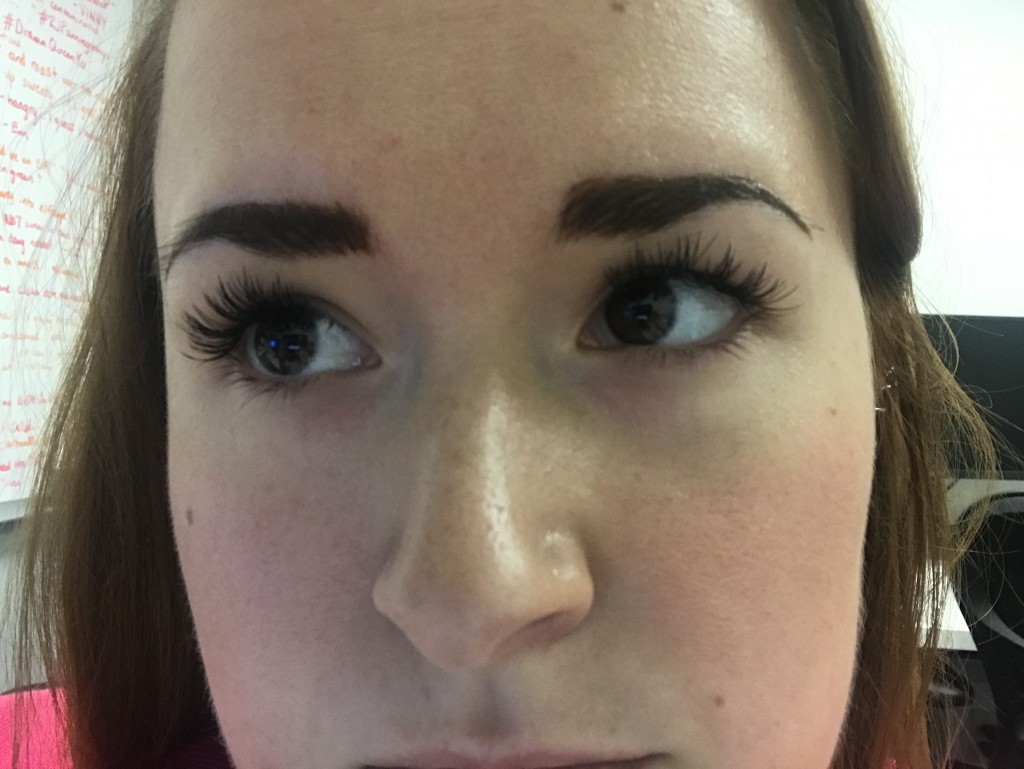
The day after my appointment, and most of the first week, my brows looked SO dark. To be honest, I LOVED it, but for some people it might be a bit of a shock to go from seeing your light, fresh brows the day before to a much darker brow the next day. Don’t worry – it’s all part of the process! The first week I felt like my brows were one solid line; not in terms of color, but because they were essentially a giant scab. That sounds like it must have looked terrible, but you couldn’t tell! In fact, I got so many compliments about my brows. Here’s what that looked like:
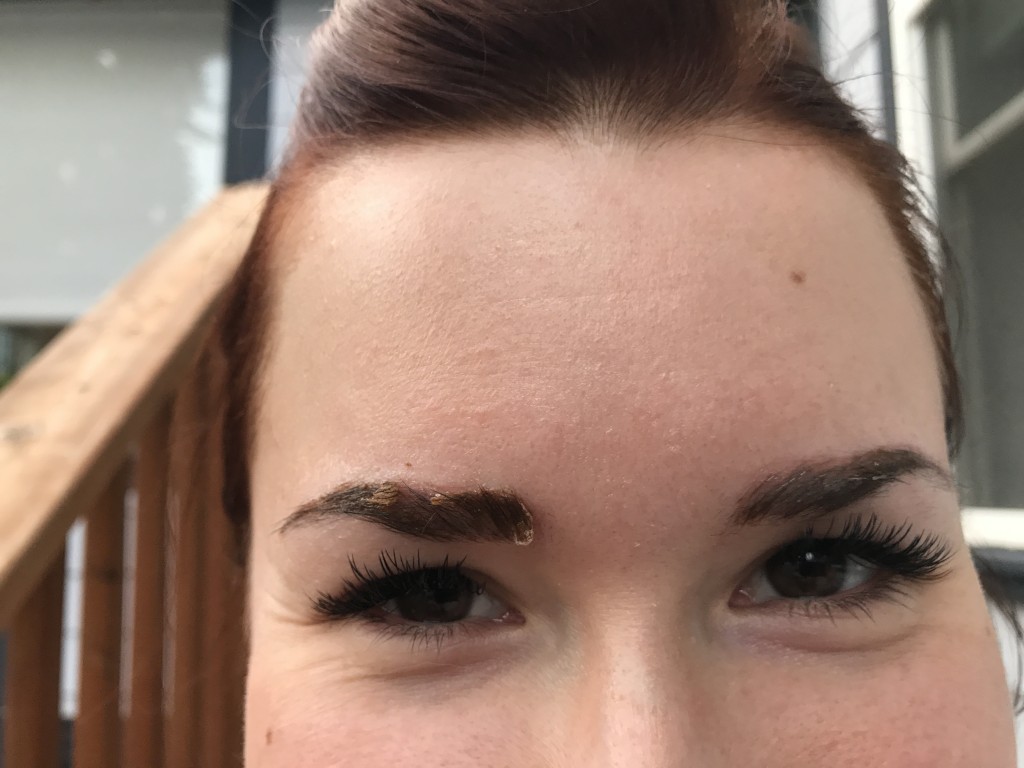
One week after my appointment, I could tell I’d reached the next phase in the healing process. I had started applying the A&D ointment and that weekend, part of the scab started lifting off. Side note: it’s not a scab like when you fall and skin your knee; it’s more like a soft scab and dead skin. (Sorry if that’s gross, but at least you know what to expect!) This part of the process was probably my least favorite. They were a little patchy as different parts of the brow shed at different rates and I couldn’t pick off any of the pieces; you must wait till they shed naturally! Luckily this part only lasted about 36 hours for me!
The second week after the procedure, following the shedding, was when my brow area started to itch (a sign of healing), but as you are still not supposed to touch your brow area for a minimum of 2 weeks, I couldn’t scratch them! I also had a LOT of skin peeling throughout the entire brow area. Additionally, I noticed that the color was lighter than it had been the previous week. While I knew it was to be expected, I became so nervous that the color hadn’t taken. I started to panic and even asked Tracy. She assured me that the color would return on the third week. And guess what? On the third week the color came back!
Four to six weeks after your first appointment, you’re ready for your touch-up!
FAQs
- What is microblading? Microblading is a form of semi-permanent makeup that mimics hair strokes to create the illusion of thick, full eyebrows. A micro-sized blade is used to make small cuts in the skin to deposit color in the area.
- What is the difference between microblading and a tattoo? Microblading is a semi-permanent makeup solution which utilizes pigments that fade over time. Tattoos are permanent and utilize ink. Microblading equipment is much smaller (a literal micro-blade) which allows for thin, lifelike hair strokes while tattoos use larger needles and create broader lines.
- Does it hurt? You know when you’re plucking your eyebrows and you get one of those deeper, longer hairs that makes your eyes water when you pull it out? That’s the most pain that you’ll experience during the process! Easy peasy!
- Will it scar? No, microblading does not cut deep enough into the skin to leave a scar.
- What is the aftercare like? The first two weeks are the most critical. During this time you should not get your brow area wet or apply anything to the area (except A&D ointment, as directed). Avoid sweating, tanning, excessive salt, Retin A or glycolic acids, peroxide or Neosporin.
- How long does it take to heal? The first three weeks are the most crucial for your healing process. Following the third week you can mostly return to your normal habits but you should still minimize sun exposure and utilize an SPF to protect the pigment from the sun.
- How long does it last? Microblading will last 1-3 years. Fading will depend on a number of factors such as skin color and pigment color. You can get a touch-up every year if needed!
- What is the long-term aftercare? Following the healing period, use a moisturizer with at least SPF 15 to protect from the sun. If you are planning a chemical peel , laser treatment, having an MRI, or other medical procedure, inform the technician that you have a cosmetic tattoo.
Created in partnership with Arched Artistry


