
How to Travel to Cuba as an American
This post update-to-date as of June 12, 2017.
Traveling to Cuba as a U.S.-citizen is not as easy as, say heading to Canada or the U.K. Due to the embargo, whose restrictions have been lessened recently, it’s now easier, but still not by any means “easy”.
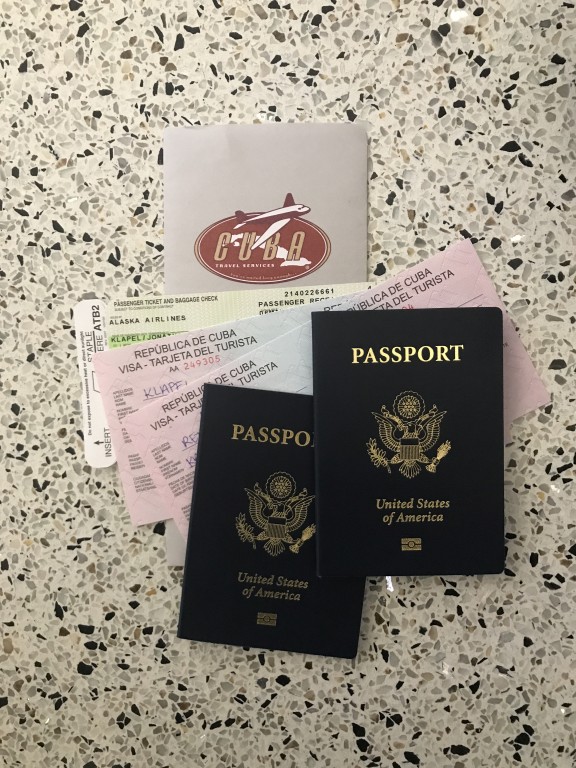
DOCUMENTATION CHECKLIST
- Passport
- Tourist Visa – You must fill out your name, birthday, passport number, and nationality. Do not make a mistake or you will need to purchase a new one and fill it out again.
- Travel Affidavit
- Printed Travel Confirmations – especially if traveling via Cubana once within Cuba
FLIGHT TO CUBA & VISAS
Booking Tickets
So you’ve decided you want to explore Cuba? Great! The first step is selecting a flight. There are a number of airlines with flights from the U.S. including Alaska, Delta, United, and Southwest. Throughout the registration process for flights to Cuba (as well as accommodations) there will be pop-ups that request you verify your trip to Cuba is for one of 12 authorized travel reasons. Make sure to select the reason you’re going and be consistent throughout any bookings you do (e.g. through Airbnb or verbal consents you give).
We chose to travel Alaska for our journey, departing from Seattle with a layover at LAX before continuing on to Havana. The rest of our travel experience is specific to Alaska and may vary based on carrier.
Pro Tip: Make sure to get travel insurance! This not only saved us with our missed connection on the return flight but also with our travel issues within Cuba. Most airlines will offer it when you buy tickets.
Visa Process
When planning a trip to Cuba as an American, your trip will need to fall within one of 12 authorized travel reasons:
- Educational – People to People
- Family Visit
- Official Business
- Journalistic Activity
- Professional Research
- Educational Activities
- Religious Activities
- Public Performances
- Support for the Cuban People
- Humanitarian Projects
- Activities of Private Foundations
- Exportation and Importation
You have the option to purchase your Visa in advance or to buy it at the airport. We recommend having it in advance as it will make for a less-stressful journey. Alaska recommended that we purchase our Visa through Cuba Travel Services.
Health Insurance
All foreigners to Cuba are required to have health insurance that is valid in Cuba. Since no U.S. health insurance plans are valid in Cuba thanks to the embargo, most U.S. airlines will automatically register you for insurance through ESICUBA, a Cuban government insurance program, which is built into the price of your ticket. If you have valid insurance or are a Cuban national, you’ll normally have to talk directly to ESICUBA.
When you arrive in Cuba, hang on to your plane ticket. If you go to a hospital during your visit, they will ask to see it. While we’re on the subject of hospitals, you’re welcome as a tourist to go in to the hospitals. In many cities and towns, you will find tourist hospitals or “Clinica Internacional”. In Havana, there doesn’t appear to be such a thing but there are a number of other hospitals around – ask your Casa or hotel host for help. When you get to the hospital, the process won’t be dissimilar from the U.S.
At the hospital I went to, I checked in with the front desk where they took my passport and then waited half an hour to see the doctor. He discussed my symptoms, felt my stomach a bit, then ordered a few tests. Once the results came back after an hour or so, he gave me a handwritten prescription and sent me over to the pharmacy where they printed up a pharmacy bill. I had to go to the payment desk before the pharmacy would give me my medications. With prescriptions in hand, I was sent back to the payment desk where they asked for my insurance info. They then gave me the choice to pay out of pocket or wait several hours while they contacted insurance. I elected to pay $68 out of pocket and am waiting to hear if travel insurance will cover it. Even if they don’t, $68 for a hospital visit that included a shot of a painkiller and medical tests is still the cheapest ER bill I’ll ever see. Once I had paid, they gave back my passport and I was free to go.
Check-In
Unlike other flights, you cannot check-in online in advance of your flight. You are required to check-in in person.
Upon check-in at Sea-Tac Airport (3 hours before flight departure), we were requested to show all of our documentation (passports, visas, travel affidavit) to the agent who verified all of our information. The process took a bit longer as it was her first time checking in anyone to Havana so she wanted to be sure she got it right.
You’ll only be given one boarding pass for both legs of your trip, plus your boarding pass doubles as your health insurance in Cuba – don’t lose it!
Layover at LAX
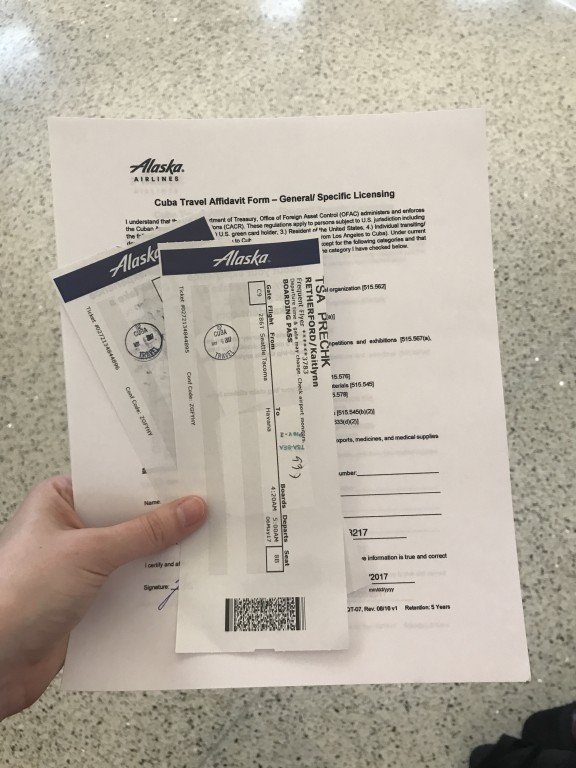
In LAX, your arrival gate is also your departure gate. After debarking the plane, we went to the Cuba Travel Services desk which is two desks down from the gate. Here you will show your boarding pass and Visa (if you pre-purchased it) where it will get a “Cuba Travel stamp”. If you did not print and fill out the travel affidavit prior to leaving, you will be able to get a copy at the Cuba Travel Services kiosk. On this form are the 12 categories of travel that are acceptable for Americans. Ensure that you select the same category that you have previously used when booking your Cuba travel. Make sure this form is filled out before boarding the aircraft. You will not be allowed on the plane until it is filled out and turned in to a representative at the gate.
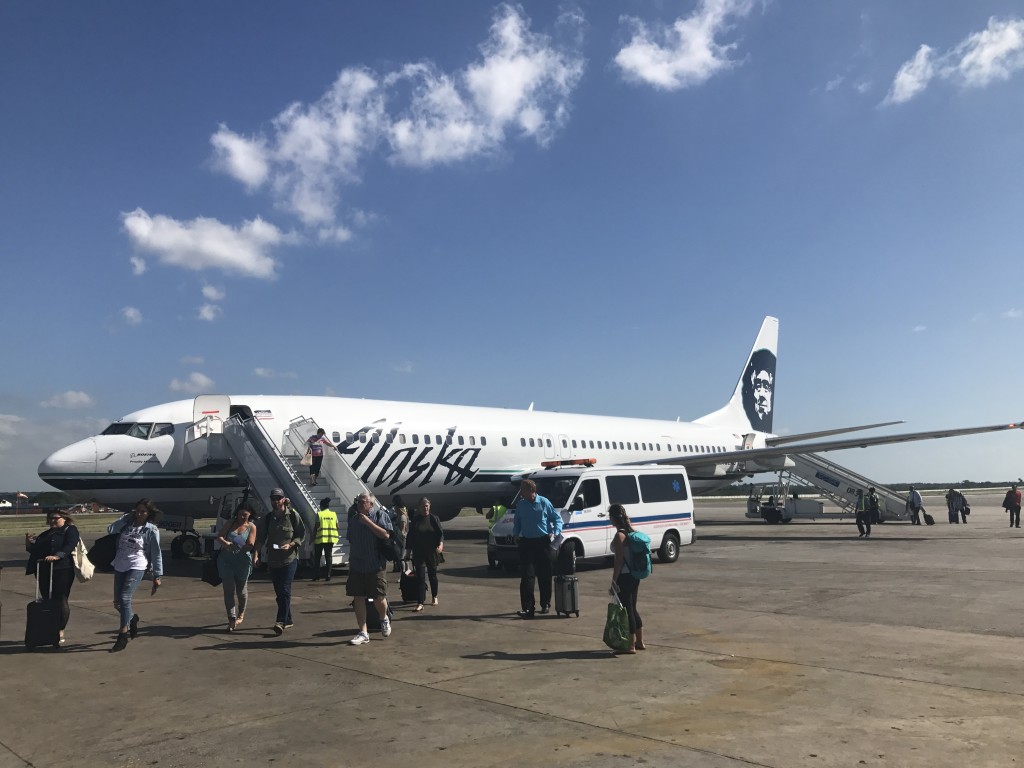
The Flight: US to Havana
Our flight to Havana was nearly full, and despite being an “international” flight, Gogo wifi worked until about 90 minutes out from Havana (when we crossed into international air space).
On the plane you’ll be given an Immigration Form and a Sanitary Statement/Cuba Health Form, which asks health-related questions. We filled out both, but only the Immigration Form was collected after landing. The Alaska Airlines crew also made announcements that terminal 2 is where we would depart from on our return flights, despite the fact that terminal 3 hosts (most) international flights. Remember: terminal 2.
We landed on the tarmac at terminal 2 and debarked the plane from there.
Arrival in Cuba: Immigrations & Customs
After walking inside the terminal, you get in line for immigration, one per person at the window (not by group). Our passports were stamped and the Visas were checked, but not taken from us. The agent buzzes you through the door and off you go through to a security line where TSA-like agents send your carry-on baggage through scanners and you walk through a metal detector. Then you wait for your checked baggage, which can take a while, though not as long as anticipated.
Once you’ve collected your bags, you’ll go through Customs where your Immigration Form will be collected. Then you’re free and clear to start your journey in Cuba!
A note to the ladies: The bathrooms here leave something to be desired. I recommend using the plane bathrooms just before landing!
Money Exchange
There are multiple options for getting Cuban cash: at the airport, a bank, Cadeca, or hotel. By exchanging money at the airport, bank, or Cadeca (casa de cambio), you will get the rate regulated by the government. Hotels will likely give you a worse exchange rate. When exchanging your money you have the option to exchange it all at once because you can sell back whatever you have left over at the end of your trip.
If you’d like to exchange money at the airport, you can, but be warned that the lines are very long! However, lines at some Cadecas can also be long or the Cadecas may close early… just because. In another instance we tried to exchange money at a hotel, but they were “no longer accepting Canadian currency” for the day. Welcome to Cuba!
Make sure that if you’re traveling from the U.S. you bring either Canadian dollars or Euros to exchange. American dollars are subject to a 10% fee. For more tips on traveling to Cuba, read my packing and travel tips article.
Leaving the Airport
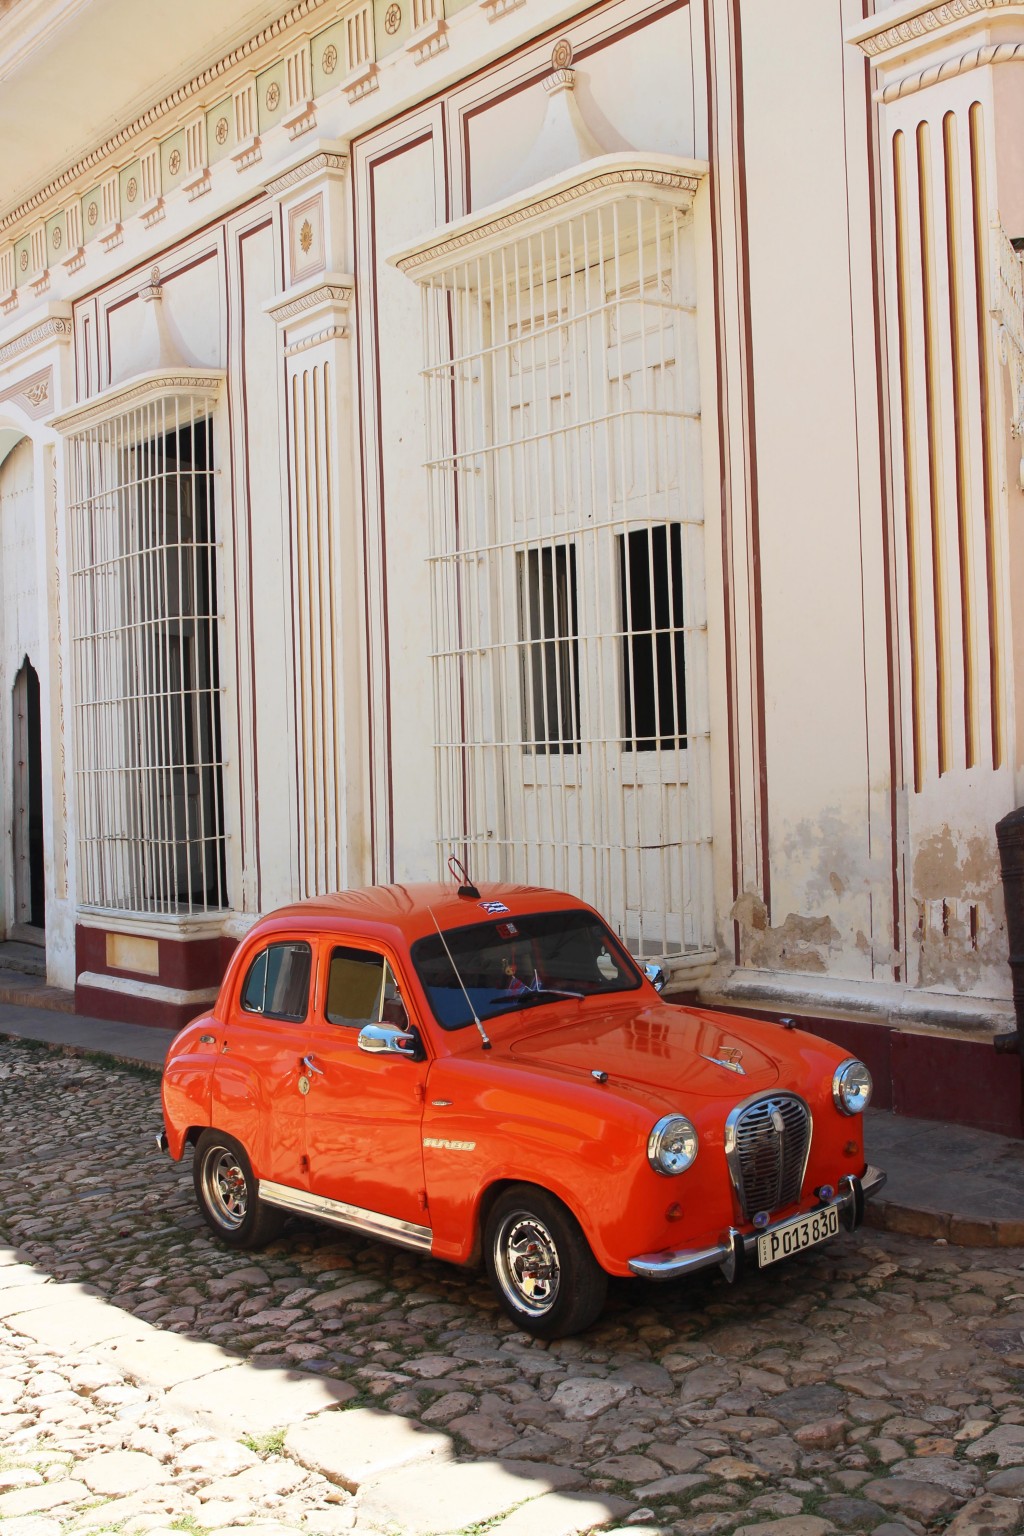
When you walk out of the airport, you’ll be greeted by a blast of warm air and throngs of people, yelling, jostling, holding signs with names, and trying to get you to take a taxi. It’s all quite overwhelming. We recommend booking a taxi through your Casa ahead of time so that all you need to do is look for your name on a sign versus trying to find and negotiate with a taxi driver. Don’t worry if you don’t book in advance though – there are plenty of taxis and you should expect to pay no more than 25 CUC for a taxi from the airport.
RETURN FLIGHT FROM CUBA
The journey to catching your flight home from Cuba can be just as exciting and exhilarating as arriving in Cuba. Our adventure included a thunderstorm, a power outage, and a missed connection with an overnight stay in Los Angeles.
Check-In
When we hopped the taxi from Havana to the airport, our taxi driver automatically thought we’d be headed to terminal 3, but luckily we remembered our Alaska Airlines instructions and informed him we needed to be dropped off at terminal 2. It was pretty much chaos outside terminal 2. Just like our arrival, there were throngs of people waiting outside and you just had to shove yourself through the pandemonium to get to the airport doors. Despite having arrived 3 hours in advance, the line to check-in and drop your bags was long.
Immigration
After check-in, we headed to immigration, where both halves of our Visas were taken and stamped. Then we proceeded through to security, which is very similar in set-up and style as when you arrive in Cuba.
Terminal 2
The waiting area is a bit dated but there are a few shops to get snacks and souvenirs in. There’s also wifi so you can use up any extra wifi cards you have lying around, which is a good way to kill the time as you wait for your flight. While waiting for our flight a thunder and lightening storm rolled in so we got to watch the storm, and the power flicker, and ultimately went out momentarily. Luckily, it did not impact our travel.
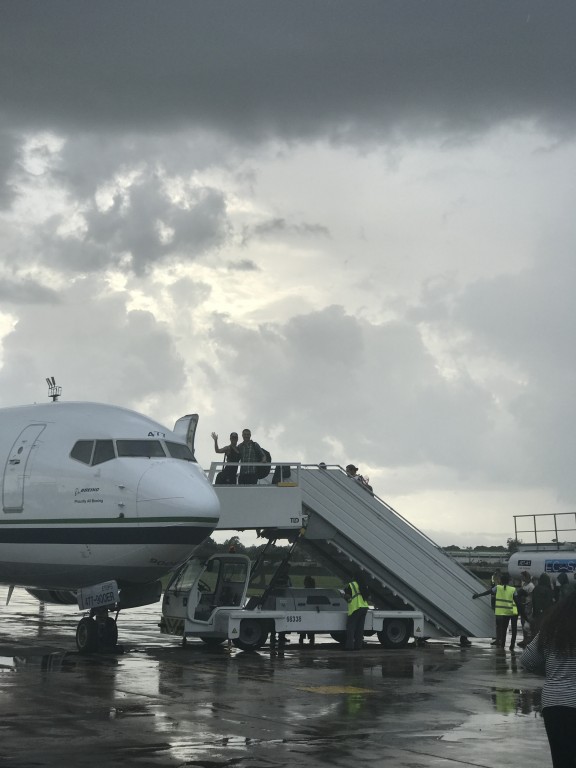
When it’s time to board the plane you’ll walk out on the tarmac and up the steps to the aircraft.
A few important notes:
- If you buy any paintings, expect to pay 3 CUC after customs for an “official stamp”
- There is an additional money exchange in the waiting area that never had a line
- If you buy rum inside the airport, make sure you get them to add the receipt (with date and inventory) INSIDE the sealed bag, or else they will take it away in LAX
Arrival at LAX
We landed on-time at LAX, but landed at a very remote, satellite gate. We all had to be bussed to the international terminal (terminal 6) for Immigration and Customs. Once dropped off, you go through the Customs line, get your print out of your passport and proceed to collect your checked baggage. Then you stand in line with your bags to make it through Immigration. This is where things got hairy for us. The line was so long, and despite having landing on-time and having a ~2 hour layover, there was no way we were going to make it through the line and to our next gate on time. We waited and waited, and when we finally made it through the line to the Immigration agent we just handed our slips over, no questions asked. From there we had to book it from terminal 6 to terminal 4 with our luggage in tow. We ran as fast as we could and by the time we made it to the Alaska desk at terminal 4, they were doing last call for us (and about 15 other passengers from our same flight). Long story short, we ended up getting on a flight the next day after spending an extensive amount of time with Alaska agent and then getting the very last room available for the night in Los Angeles.


